We have uncovered this article pertaining to Tools You Need to Install a New Bathtub listed below on the net and reckoned it made sense to relate it with you on this page.
Setting up a tub isn't precisely rocket science, but it does require solid plumbing, carpentry, and also occasionally, tiling skills. Replacing an old bathtub with a brand-new one is likewise a moderately tough job. If the old bathtub is conveniently accessible, the task can relocate immediately; if you have to open a wall to remove the old bathtub as well as position the new bathtub, the job is much harder. In either case, the project is within a residence handyman's abilities, although you will need an assistant to leave the old tub and embeded in the brand-new one. Ensure you have actually certified yourself for the job and fit trying it. Instead of working with a contractor to take control of a halfway-completed project, it is much better to consider employing one before you start. Opportunities are you may need a specialist plumber to make tube connections.
This article will certainly help you mount a new tub in your restroom if you have currently purchased a new bathtub as well as don't require to alter the arrangement of your previous water pipes.
Your tools as well as material checklist should consist of the following:
- New Tub
- Hammer
- Pipeline Wrenches
- Prybar
- Shatterproof glass
- Level
- Pliers
- Flexible Wrench
- Putty Knife
- Screwdriver
- Cold Knife
- Tape Measure
- Pipeline Caps
Planning for the Installation
To start with, the supporting structure supplied with the bathroom ought to be fitted (if called for) according to the producer's guidelines. Next, fit the faucets or mixer to the bathtub. When suitable the tap block, it is necessary to see to it that if the tap includes a plastic washer, it is fitted in between the bath as well as the faucets. On a plastic bath, it is also reasonable to fit a supporting plate under the faucets device to avoid pressure on the tub.
Fit the adaptable tap ports to the bottom of the two taps making use of 2 nuts as well as olives (often provided with the tub). Fit the plug-hole electrical outlet by smearing mastic filler round the sink electrical outlet opening, and afterwards pass the outlet via the hole in the bath. Utilize the nut provided by the producer to fit the plug-hole. Take a look at the plug-hole outlet for an inlet on the side for the overflow pipeline.
Next off, fit the end of the versatile overflow pipeline to the overflow electrical outlet. After that, screw the pipe to the overflow face which need to be fitted inside the bath. Ensure you make use of every one of the supplied washers.
Attach the catch to the bottom of the waste outlet on the bathtub by winding the string of the waste outlet with silicone mastic or PTFE tape, and also screw on the catch to the electrical outlet. Connect the bottom of the overflow tube in a similar manner.The bathroom must now prepare to be suited its last placement.
Removing Old Taps
If you need to replace old faucets with brand-new ones as a part of your installation, then the first thing you must do is separate the water supply. After doing so, turn on the taps to drain pipes any water staying in the system. The process of eliminating the existing faucets can be rather bothersome as a result of the limited accessibility that is usually the situation.
Utilize a basin wrench (crowsfoot spanner) or a tap tool to undo the nut that connects the supply pipes to the faucets. Have a fabric prepared for the continuing to be water that will certainly come from the pipes. When the supply pipelines have been eliminated, utilize the exact same tool to loosen the nut that holds the faucets onto the bath/basin. You will need to stop the solitary faucets from transforming during this process. When the faucets have been removed, the holes in the bath/basin will certainly have to be cleansed of any type of old sealing substance.
Before proceeding to fit the brand-new faucets, contrast the pipeline links on the old faucets to the brand-new faucets. If the old taps are longer than the brand-new faucets, after that a shank adapter is needed for the brand-new faucets to fit.
Mounting the Bath tub
Making use of both wood boards under its feet, position the bath tub in the called for setting. The wooden boards are practical in uniformly spreading the weight of the bathtub over the area of the boards instead of concentrating all the weight onto 4 little factors.
The following objective is to ensure that the bathtub is leveled all round. This can be achieved by inspecting the level as well as changing the feet on the tub until the spirit level reads level.
To install taps, fit the bottom of the outermost adaptable faucet port to the proper supply pipeline by making a compression sign up with; then do the same for the other tap.
Activate the water supply and also check all joints and brand-new pipework for leaks and tighten them if necessary. Load the tub and also check the overflow electrical outlet and also the normal outlet for leakages.
Ultimately, deal with the bathroom paneling as defined in the supplier's user's manual. Tiling as well as sealing around the tub ought to wait until the bathtub has actually been made use of at the very least when as this will settle it into its final placement.
Suitable New Taps
If the tails of the new taps are plastic, after that you will certainly require a plastic port to prevent damages to the string. One end of the port fits on the plastic tail of the tap and the various other end offers a link to the current supply pipes.
If you need to fit a monobloc, then you will certainly need lowering couplers, which connects the 10mm pipeline of the monobloc to the conventional 15mm supply pipe.
Next off, place the tap in the mounting opening in the bath/basin making sure that the washers are in location between the tap and also the sink. Protect the tap in place with the manufacturer given backnut. When the tap is firmly in place, the supply pipes can be attached to the tails of the taps. The faucets can either be connected by utilizing corrugated copper piping or with normal faucet connectors. The previous kind ought to be attached to the tap ends first, tightening up just by hand. The supply pipes can later on be linked to the other end. Tighten up both ends with a spanner after both ends have been linked.
Tiling Around the Bathtub
In the location where the bath meets the floor tile, it is required to seal the accompanies a silicone rubber caulking. This is essential as the fitting can relocate enough to split a rigid seal, creating the water to permeate the wall surface between the bathroom as well as the tiling, leading to issues with dampness and also possible leakages to the ceiling below.
You can select from a variety of coloured sealers to blend in your components and installations. They are sold in tubes as well as cartridges, and also are capable of securing spaces as much as a size of 3mm (1/8 inch). If you have a bigger gap to load, you can fill it with twists of drenched newspaper or soft rope. Bear in mind to always fill up the bathtub with water before securing, to allow for the motion experienced when the bathtub remains in usage. The sealer can crack relatively very early if you do not consider this movement prior to securing.
Additionally, ceramic coving or quadrant floor tiles can be used to edge the bathroom or shower tray. Plastic strips of coving, which are easy to use and cut to dimension, are also quickly offered on the marketplace. It is a good idea to fit the floor tiles using water-resistant or water-proof adhesive as well as cement.
How to Install or Replace a Bathtub
Find Your Dimensions
The first step in any bathtub installation or replacement is to select the right size tub for your bathroom. Start by measuring your existing bathtub’s alcove from wall to wall. The standard size for bathtubs is around 5 feet long and 30 or 32 inches wide. Purchase the size that’s closest to your previous tub.
After you’ve measured, you’ll need to figure out what type of tub you need. Face the alcove. If the drain is on the right-hand side, you’ll need a right drain tub. If it’s on the left, get a left drain tub. Easy enough, right?
Disconnect the Water Supply and Drain Assembly
Before you can start on your removal, make sure that you turn off the tub’s water supply. Some bathrooms have a shutoff valve, but if you don’t see one, you’ll need to turn off the supply at your house’s water main. Once the water’s off, open the valves to release any remaining air in the supply lines.
Then, disconnect the tub drain flange. This process varies based on the type of drain you have, but in most cases, you’ll need a drain flange removal tool to perform this task. If you’re feeling handy, you might be able to use a pair of needle-nose pliers to twist and pull the flange.
Now comes the fun part. In order to disconnect the drain assembly, you’ll need to be able to get to the space underneath the tub. You might need to access the tub drain from a crawlspace or a basement. Don’t forget to take a pipe wrench with you, as you’ll need it to loosen the pipe at the connection.
Cut Out the Old Tub
After removing the drainpipe assembly, you can take out the old bathtub. Cut a strip above the tub edge in the wall surrounding the bathtub that's about 6 inches in height. The tools you need here may vary depending on the type of wall surround you have in the alcove. If you’re cutting drywall, use a drywall saw and remove the section of the wall all the way down to the studs. If you have tile, you’ll need to use a grinder with a diamond blade to cut through the grout line. Then, use a chisel to remove the individual tiles. Take care here not to cut through any studs.
Find the tub flange. Remove the screws that attach the flange to the studs in the wall. At this point, the tub should be freed from the wall.
Once you’ve removed the flange, use a utility knife to cut away the caulk between the tub and the floor. When this is done, you should be able to lift the tub up and out of the alcove. Keep in mind that, depending on what it’s made of, the old tub could be tremendously heavy. You should plan to have a friend help you move it just in case.
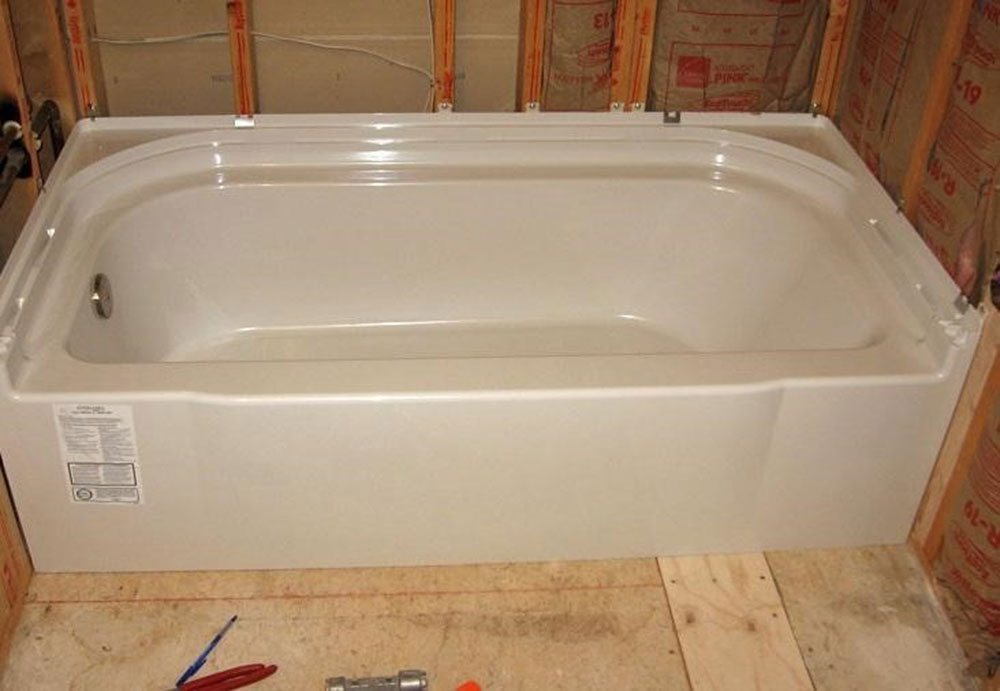
Install the New Tub
Before you make any adjustments to the area, place the new tub in the alcove to make sure it fits properly and that the tub drain lines up with the P-trap underneath the floor.
Remove it and install a 2 x 4 ledger board. Measure the tub’s flange, then mark that height on the wall. Screw the ledger board to studs in the wall. This will help to support the weight of the tub.
Once the ledger board has been installed, go ahead and secure the drain to the tub. For this step, you’ll need some plumber’s putty. Roll a small amount of putty in your hands and wrap it around the underside of the drain flange. Push the drain into the tub from underneath the tub.
When the drain has been attached, connect the overflow drain. To do this, you’ll place the gasket on the overflow elbow and move it behind the tub. Once that’s on, connect the overflow pipe and the drainpipe, but take care not to overtighten.
Secure the Tub
After the connections are in, it’s time to set the tub in place. Before you start, make sure the flange lines up with the markings you made in Step 4. Because the ledger board holds the tub in place, it’s important that it matches up. If not, you’ll need to remove it and readjust.
Once your measurements line up, attach the flange to the studs on all three sides of the wall. Please note that you should not screw the flange to the wall. Instead, you should use roofing nails because they won’t rust over time. When the tub is in place, install the baseboard and the molding in front of and around the tub.
Repair and finish off the drywall or tile that you cut in Step 3. If you’re installing a fiberglass bath surround, now’s the time to adhere it to the alcove.
Then, enjoy your tub! While all these steps might seem intimidating, removing and installing a new bathtub is a relatively easy DIY project that can be completed in a single day. And now, when you settle in for your next bubbly soak, you can enjoy your bath without the distraction of a tub in disrepair.
https://www.homeserve.com/en-us/blog/how-to/bathtub-replacement/
We are very enthusiastic about Installing A Bathtub and I'm hoping you enjoyed our blog post. For those who enjoyed our post if you please do not forget to pass it around. Many thanks for taking the time to read it.
Get Estimate
Comments on “Exactly How to Set up a Tub”